DIY Earring Holder
I’m a fairly crafty person. I like to create things, and I like to make things fit my style. I’m also a thrifty person, and love a good deal. I’ve been wanting to try to create a DIY earring holder, and I finally found the perfect materials to start. If you want to find out how to create your own, keep reading!
First, I needed a picture frame. Honestly, this is why it took me so long to start on this project. I like older-looking frames – ones with pretty designs on the edges. I needed one that was a decent size, also, because I have a fairly large jewelry collection (I definitely get this from my grandmother. She LOVED her jewelry and had a pretty nice collection). I finally found the perfect frame at a yardsale for $1 a couple of weekends ago. I found a smaller one that’s similar, so I snagged it too. If you’re looking for a cheap, nice frame, definitely check yardsales and thrift stores like Goodwill. I found a few nice frames at the Georgetown Goodwill the other day, and I might go back and snag some of those also.
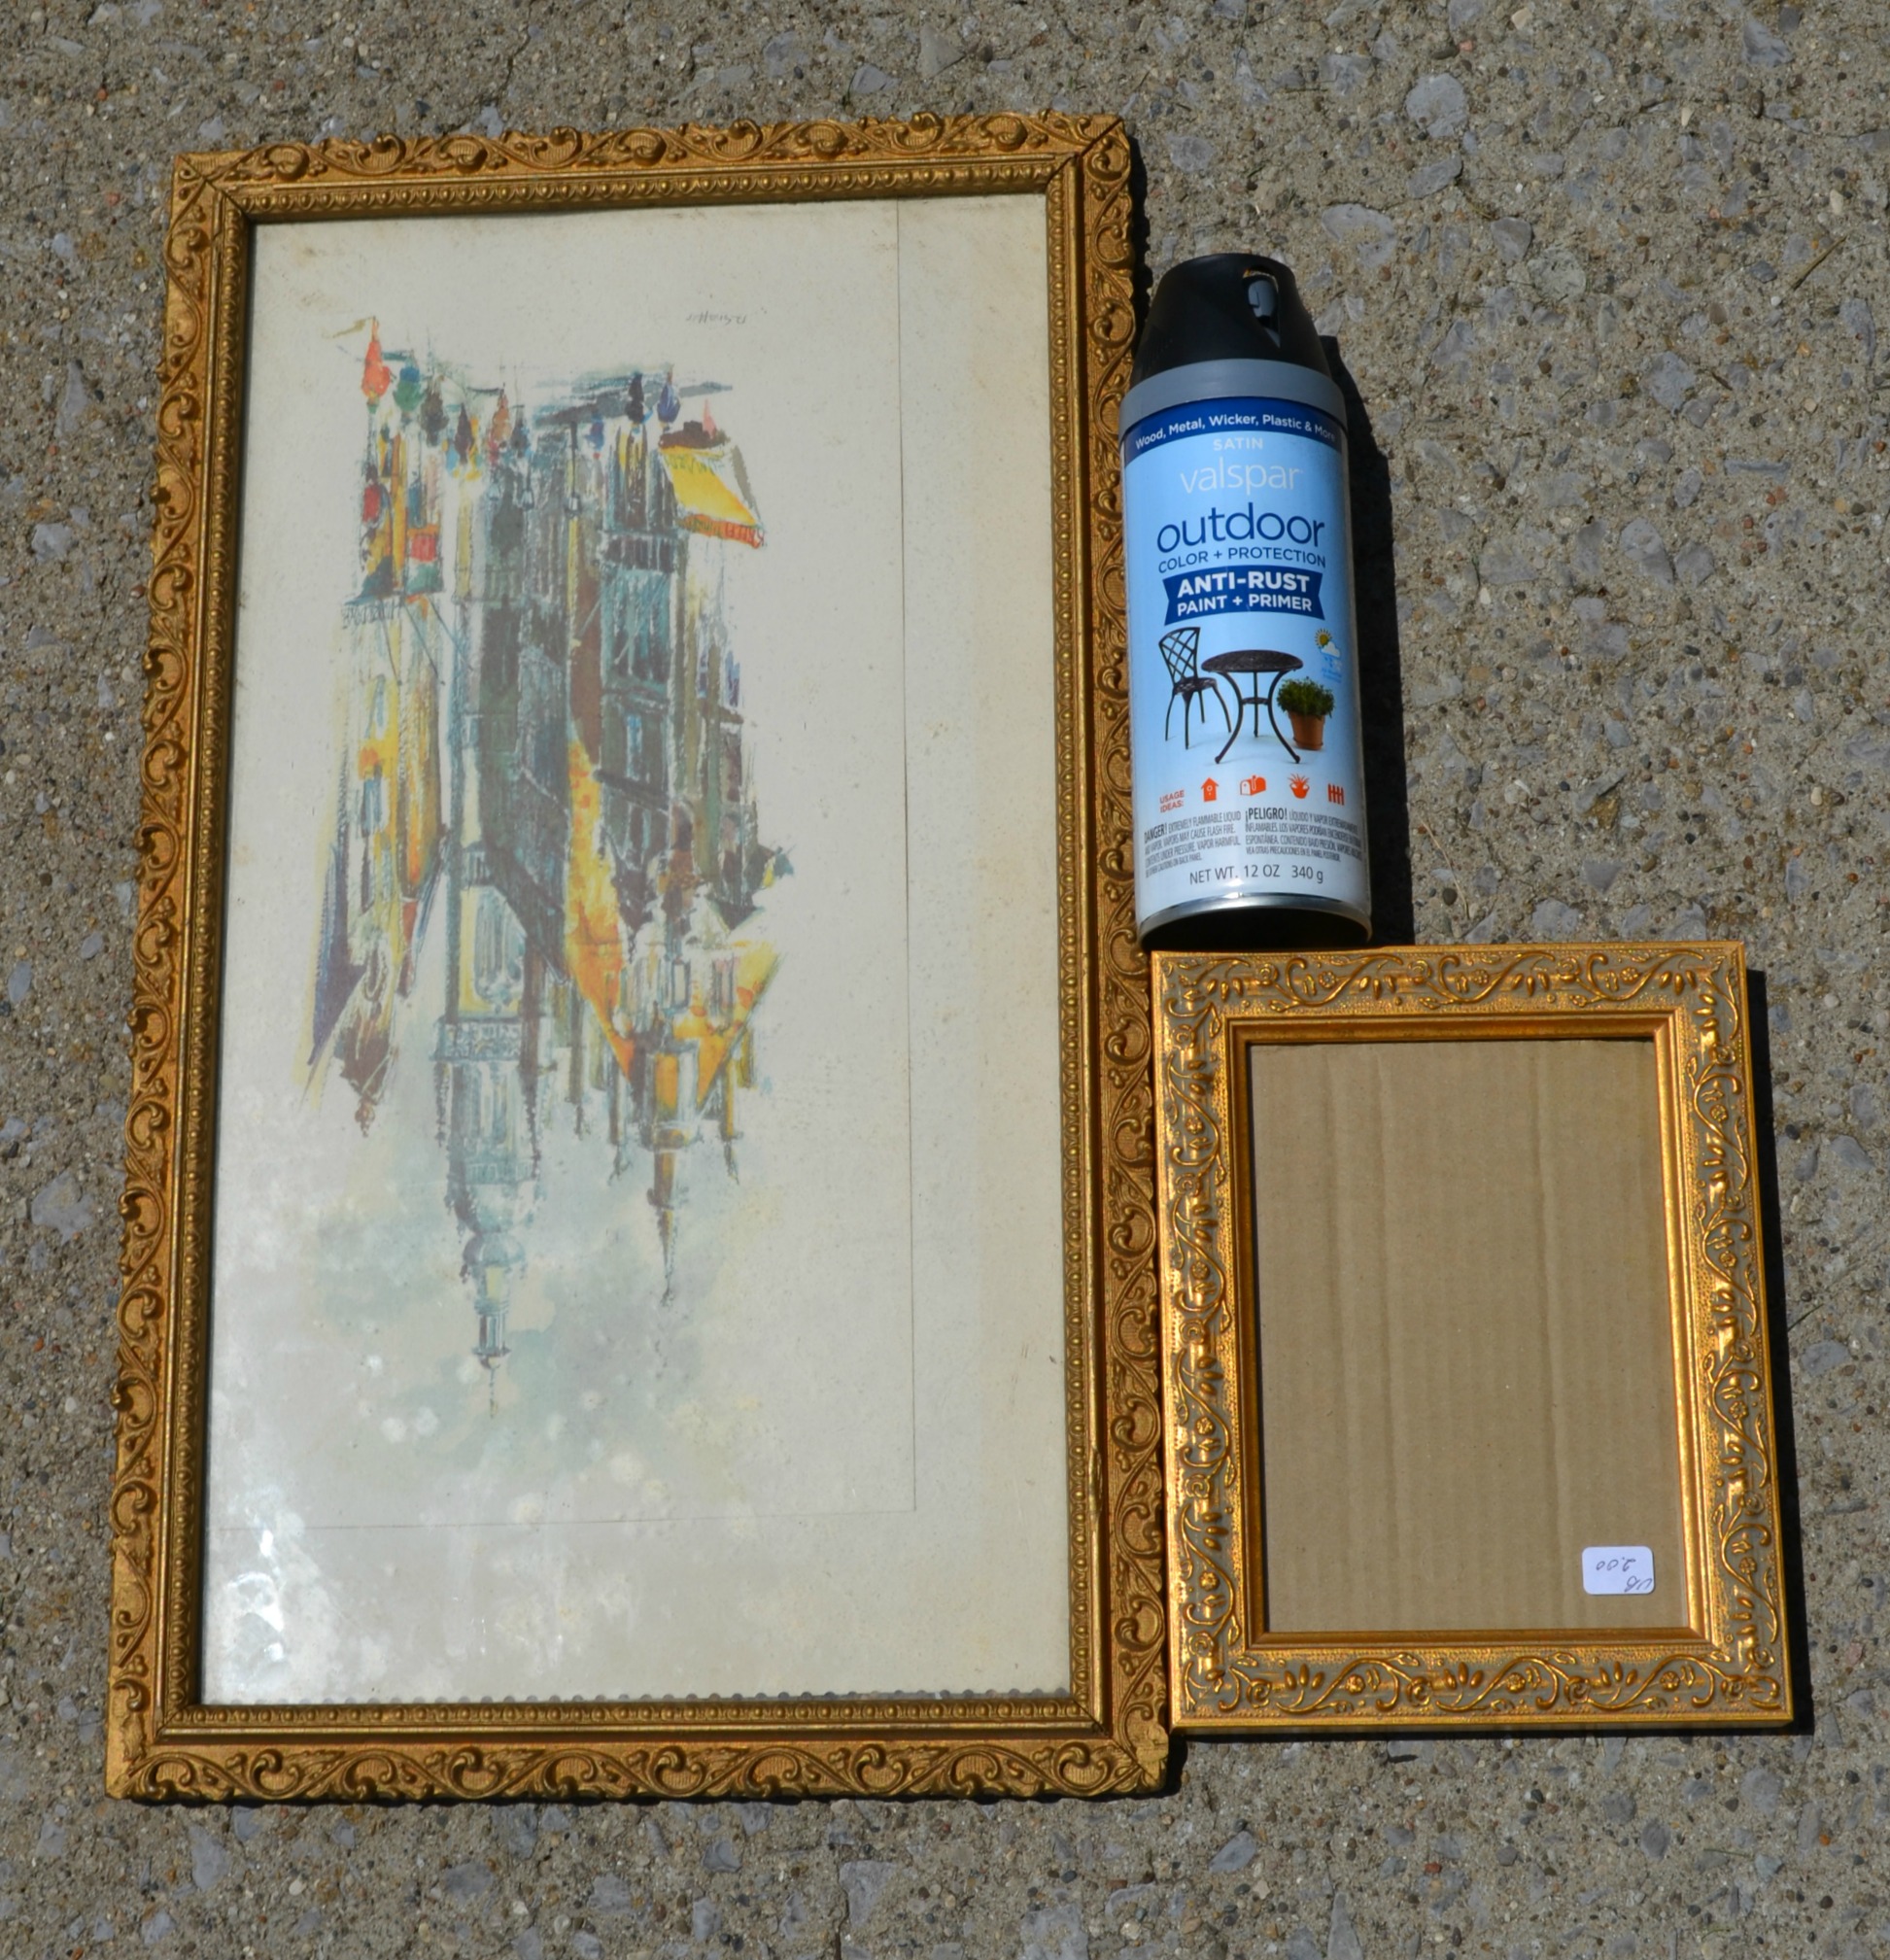
I’m not particularly fond of gold. I’ve grown to like gold jewelry, but I still prefer silver. So I decided to spray paint the frames black. All my shelves in my home have been painted black, for the same reason. I just think black gives everything a modern, classy look, and it matches everything.
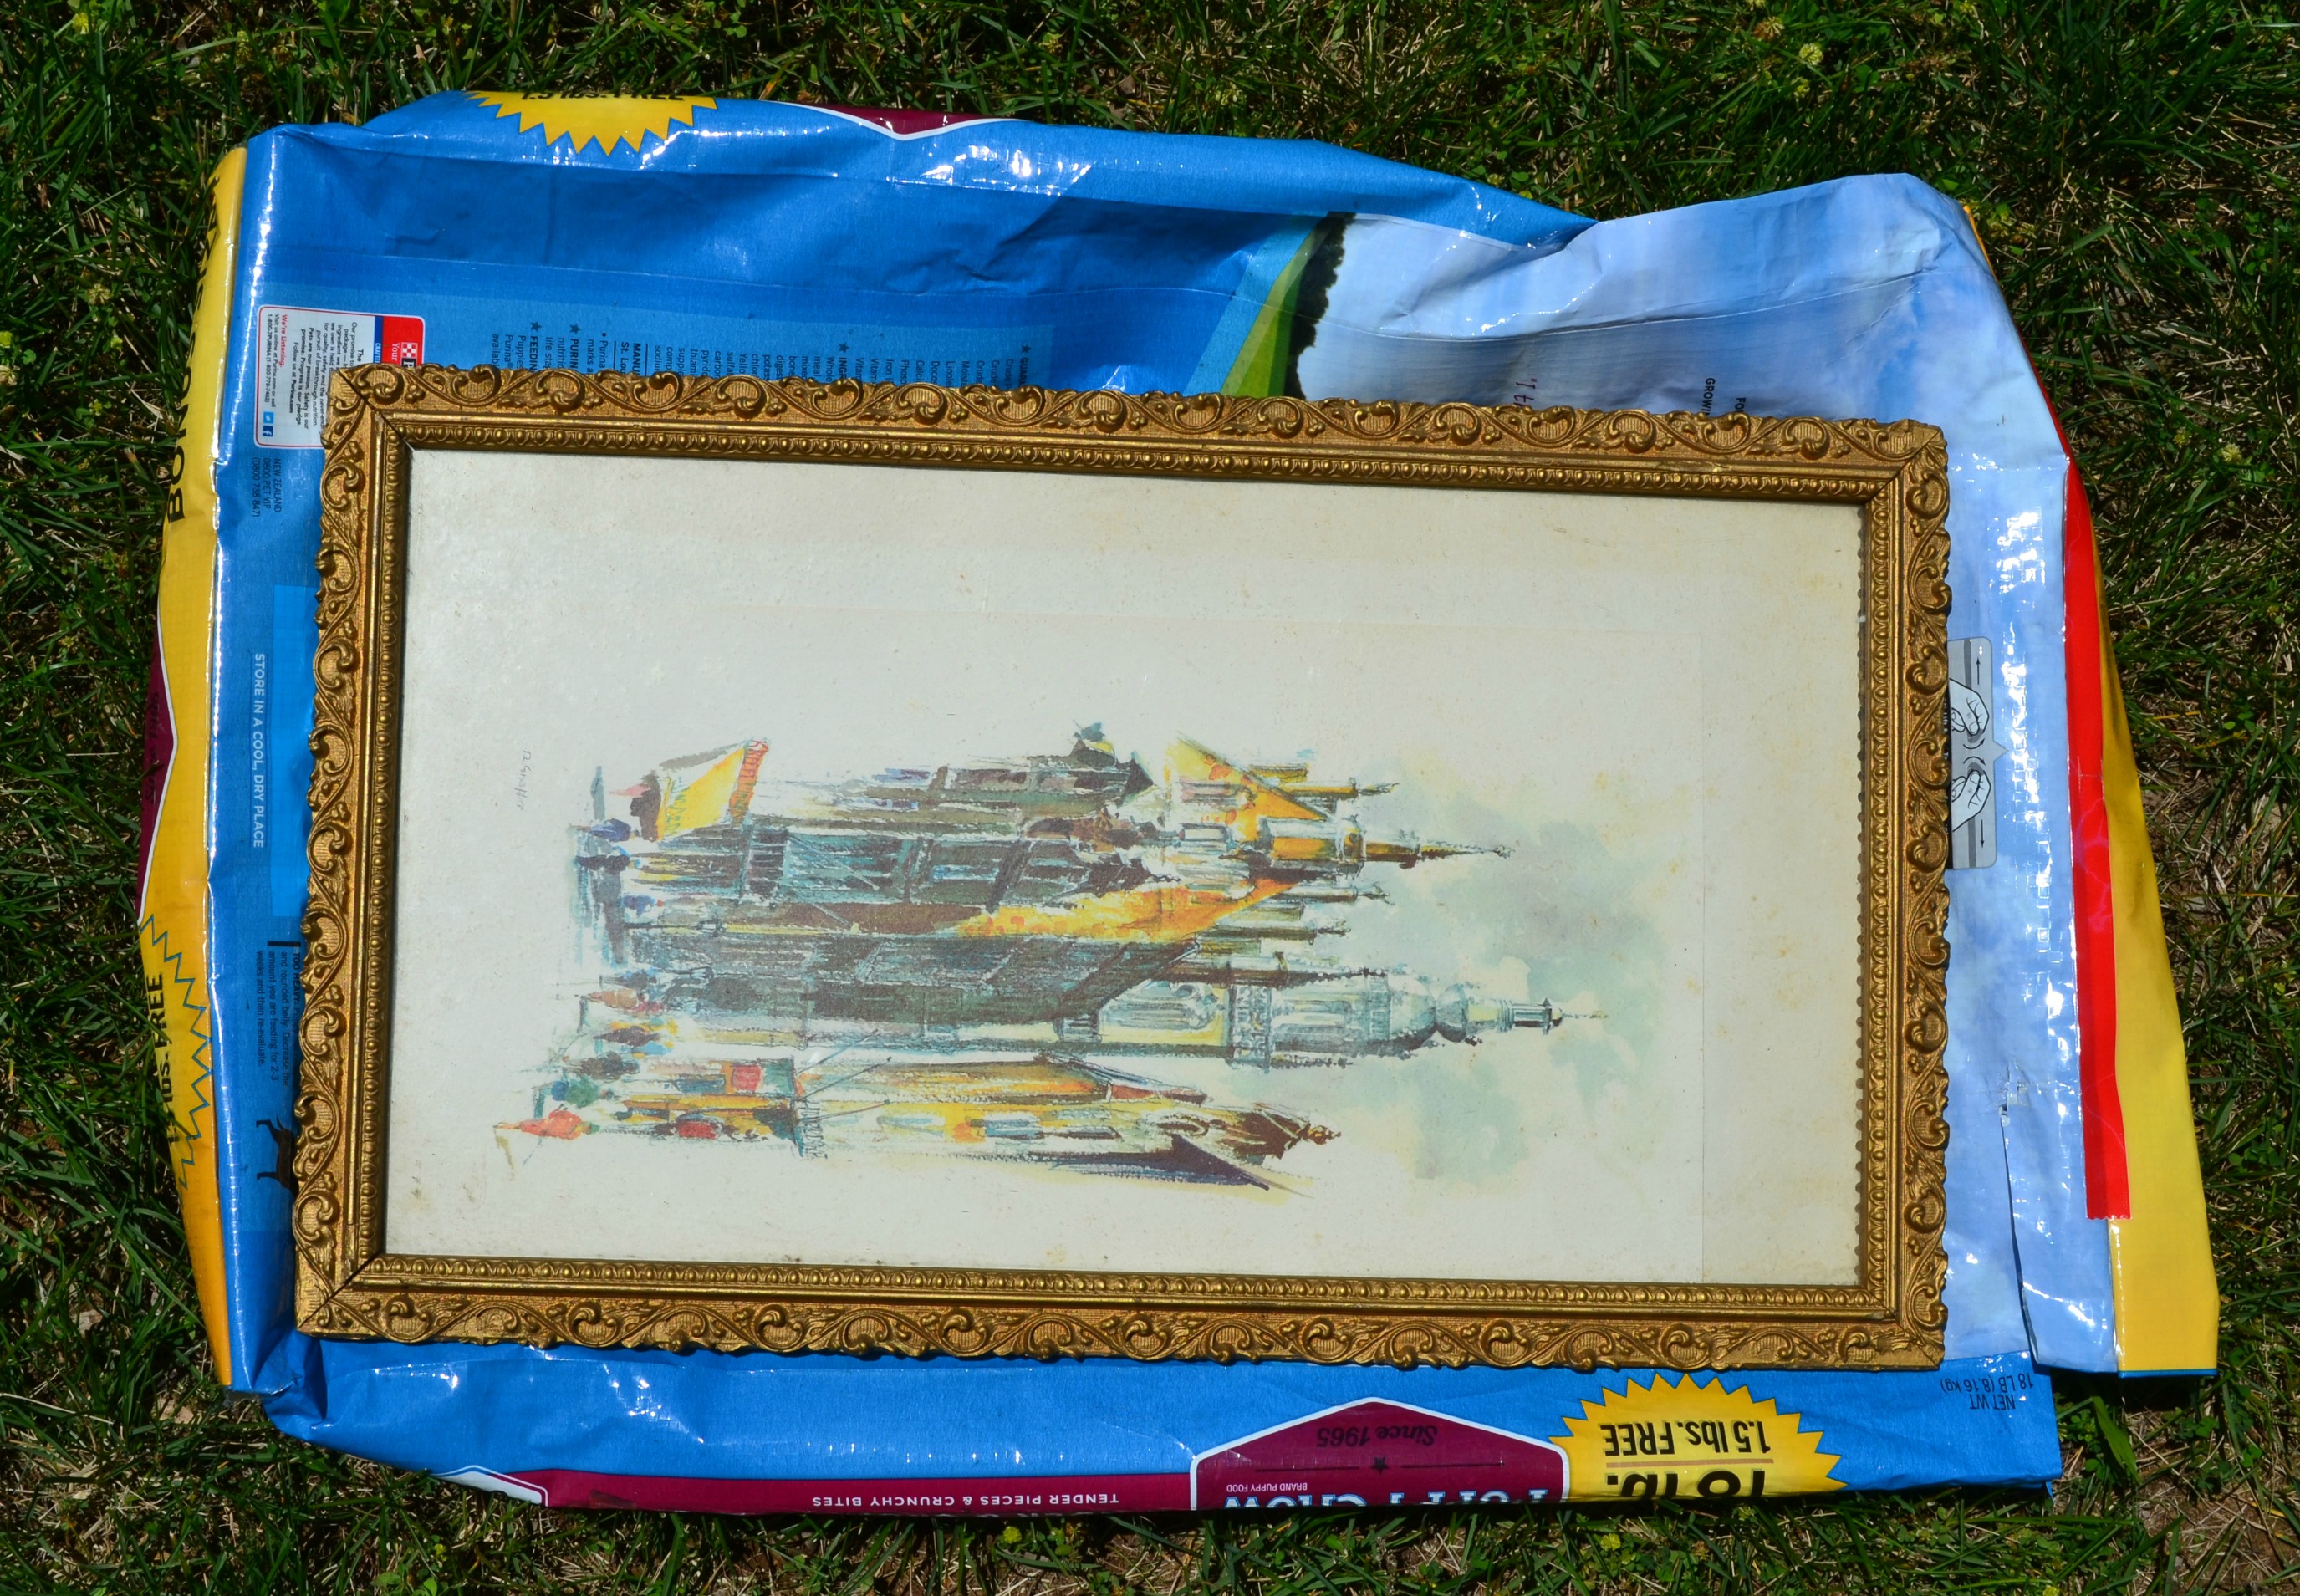
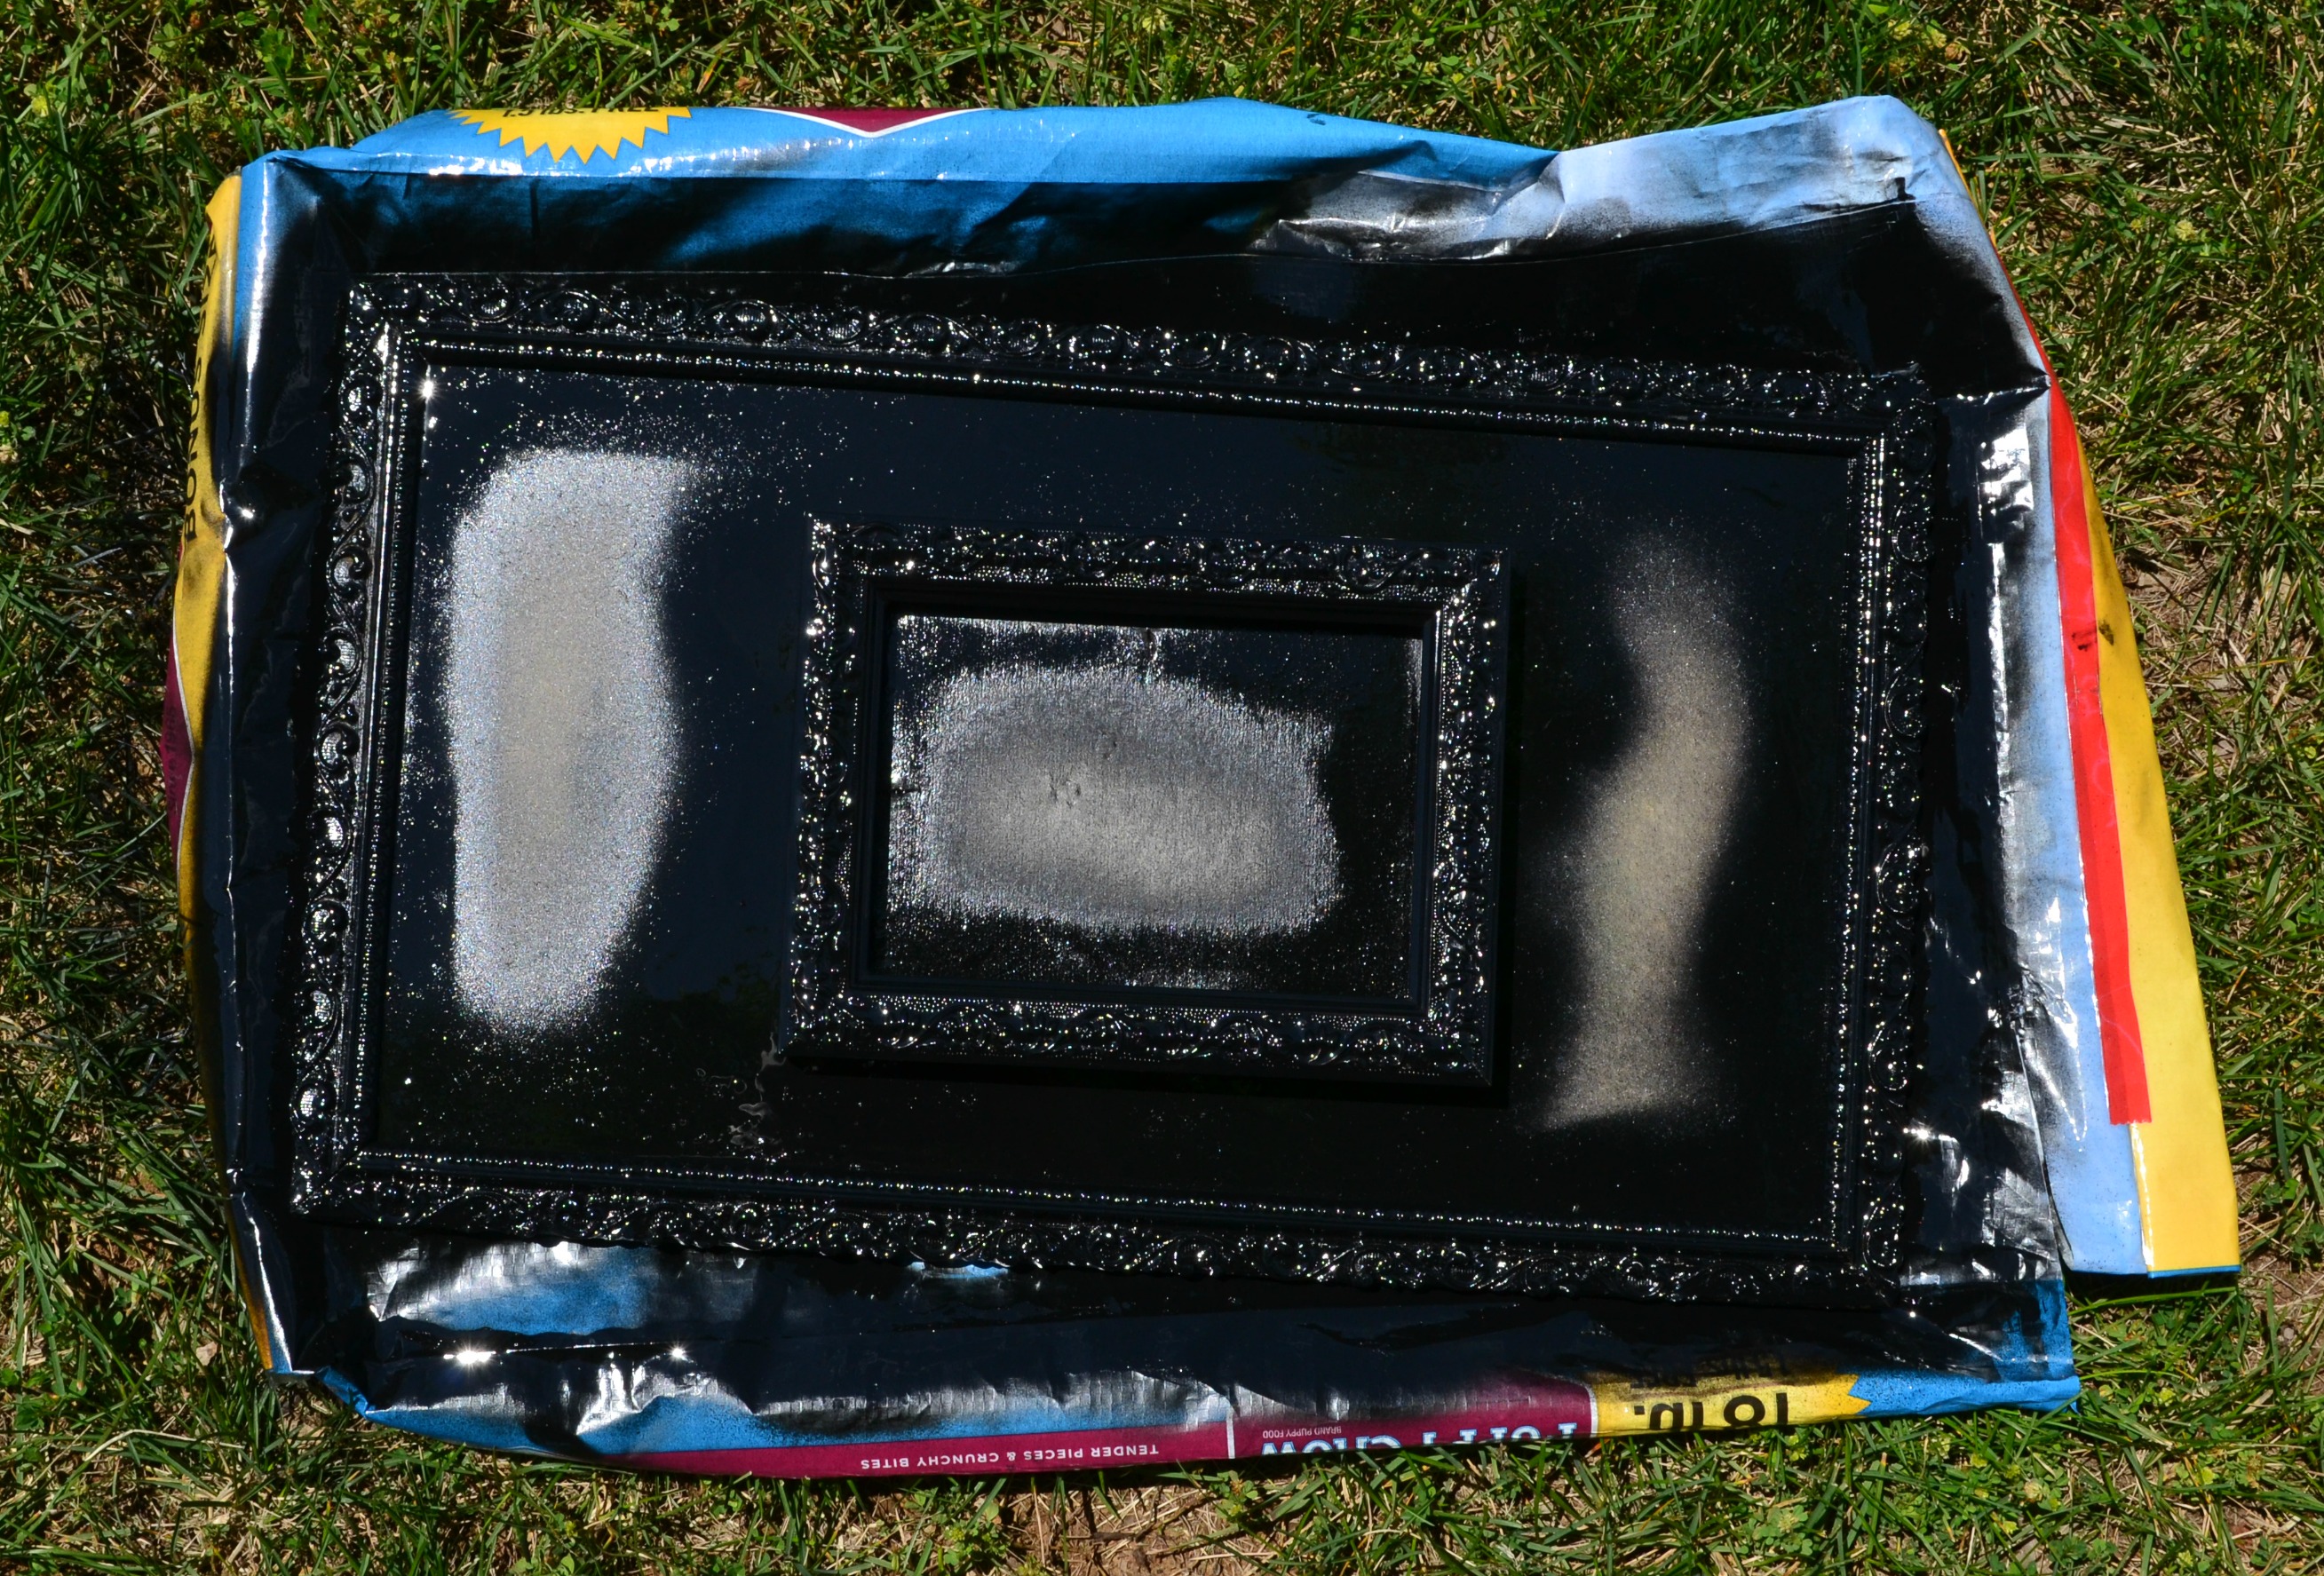
I laid the frames out on a bag of dog food in the grass (I hadn’t thrown it away yet. If you have some cardboard or newspaper, this works well also) to keep the paint from getting all over the grass. You can remove the glass before painting, or leave it in. I chose to leave it in, because it was nailed in on the back, and I didn’t want to go back in and get a hammer to remove the nails. I waited until after I sprayed the frame to remove the glass. Either way is fine, whatever works best for you.
After spraying, I brought the larger frame inside. I laid it on a piece of foam board, because it was sturdy and could take some pressure. I removed the glass from the frame, and turned it over so the front was facing down.
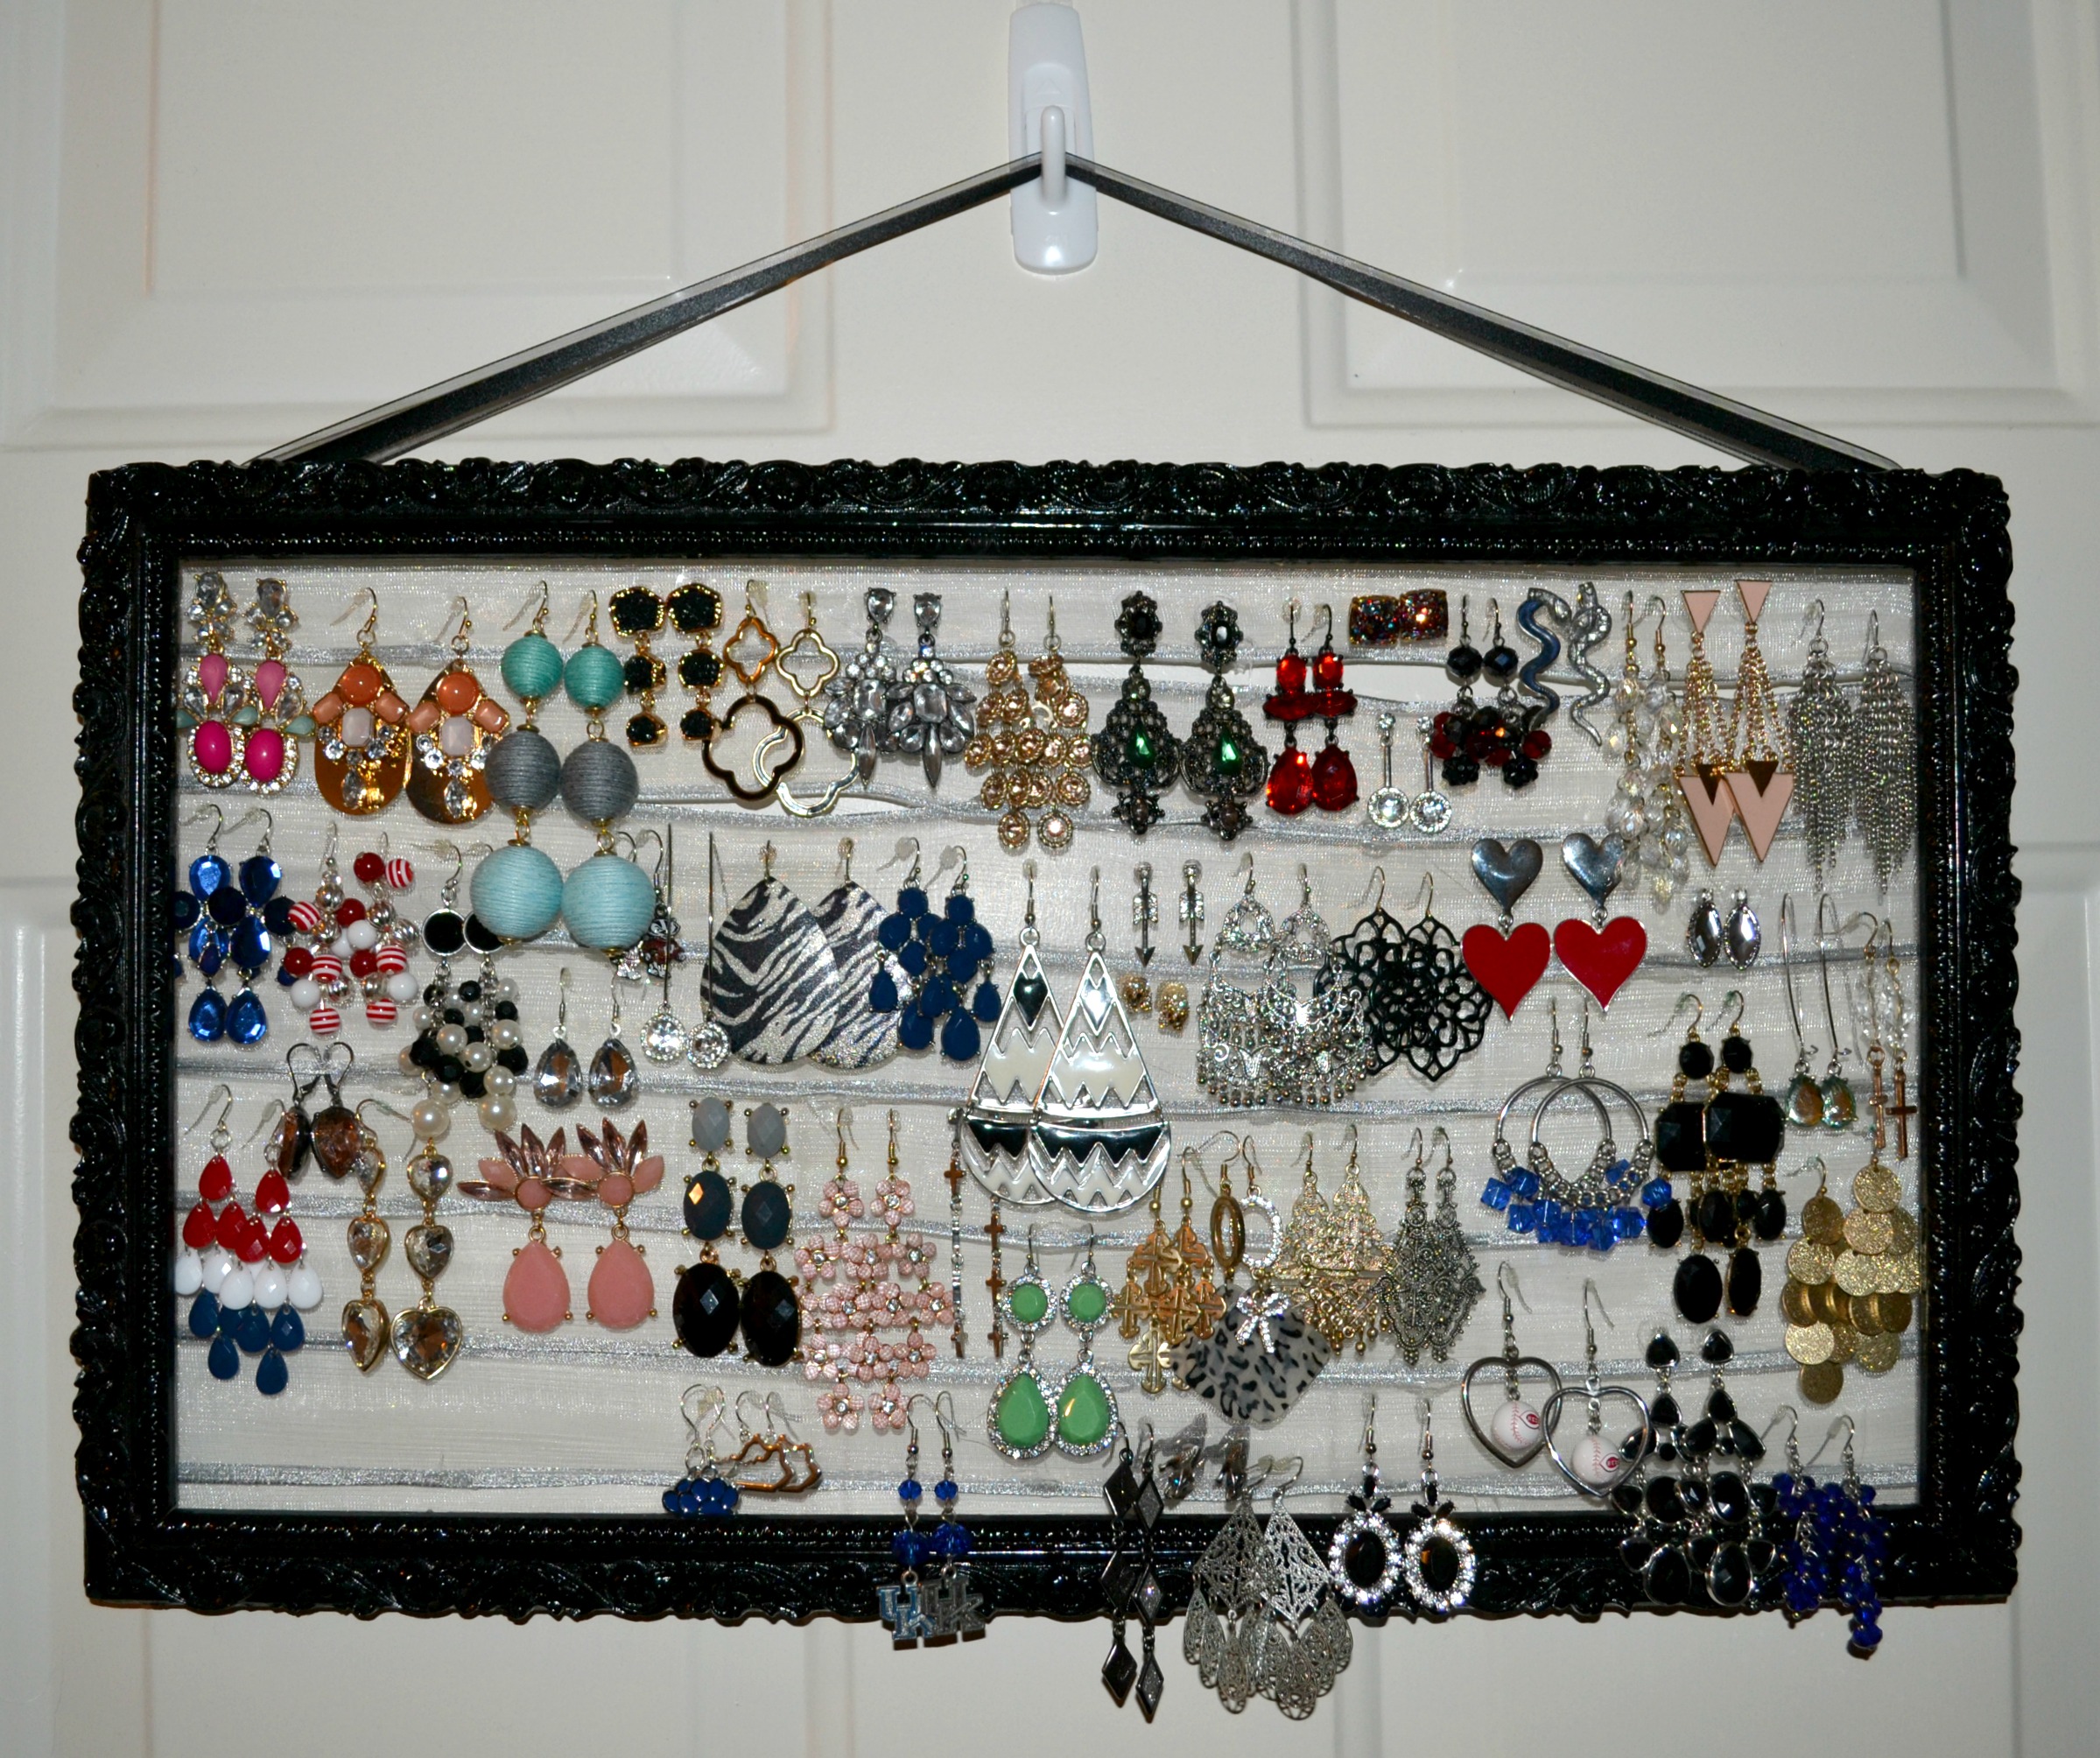
To hang the earrings, I wanted to use sheer ribbon. This would allow me to poke holes wherever I wanted, depending on the length of the earring. Lace also works, but I wanted to be able to place the earrings where I wanted, and the holes in lace don’t always allow that. I purchased a roll at Walmart and got to work. I hot glued the ribbon from one end to the other by placing glue on each side then pressing the ribbon onto the glue strips. You can turn the frame whichever way you want; I just figured this way would be easiest for me.

Two things: I ended up needing to go back and get another roll, because one was not enough for my frame. If you’re working with a smaller frame, one may be enough, but I would recommend getting two in the beginning just in case. Also, I ended up gluing the bottom of each row to the top of the next. It made it a little more cohesive, and I think it will hold up better by gluing the ribbon together. This way there aren’t large gaps between the rows of ribbon either (as shown above).
I glued the ribbon until the back of the frame was completely covered, then trimmed the excess ribbon off the edges.
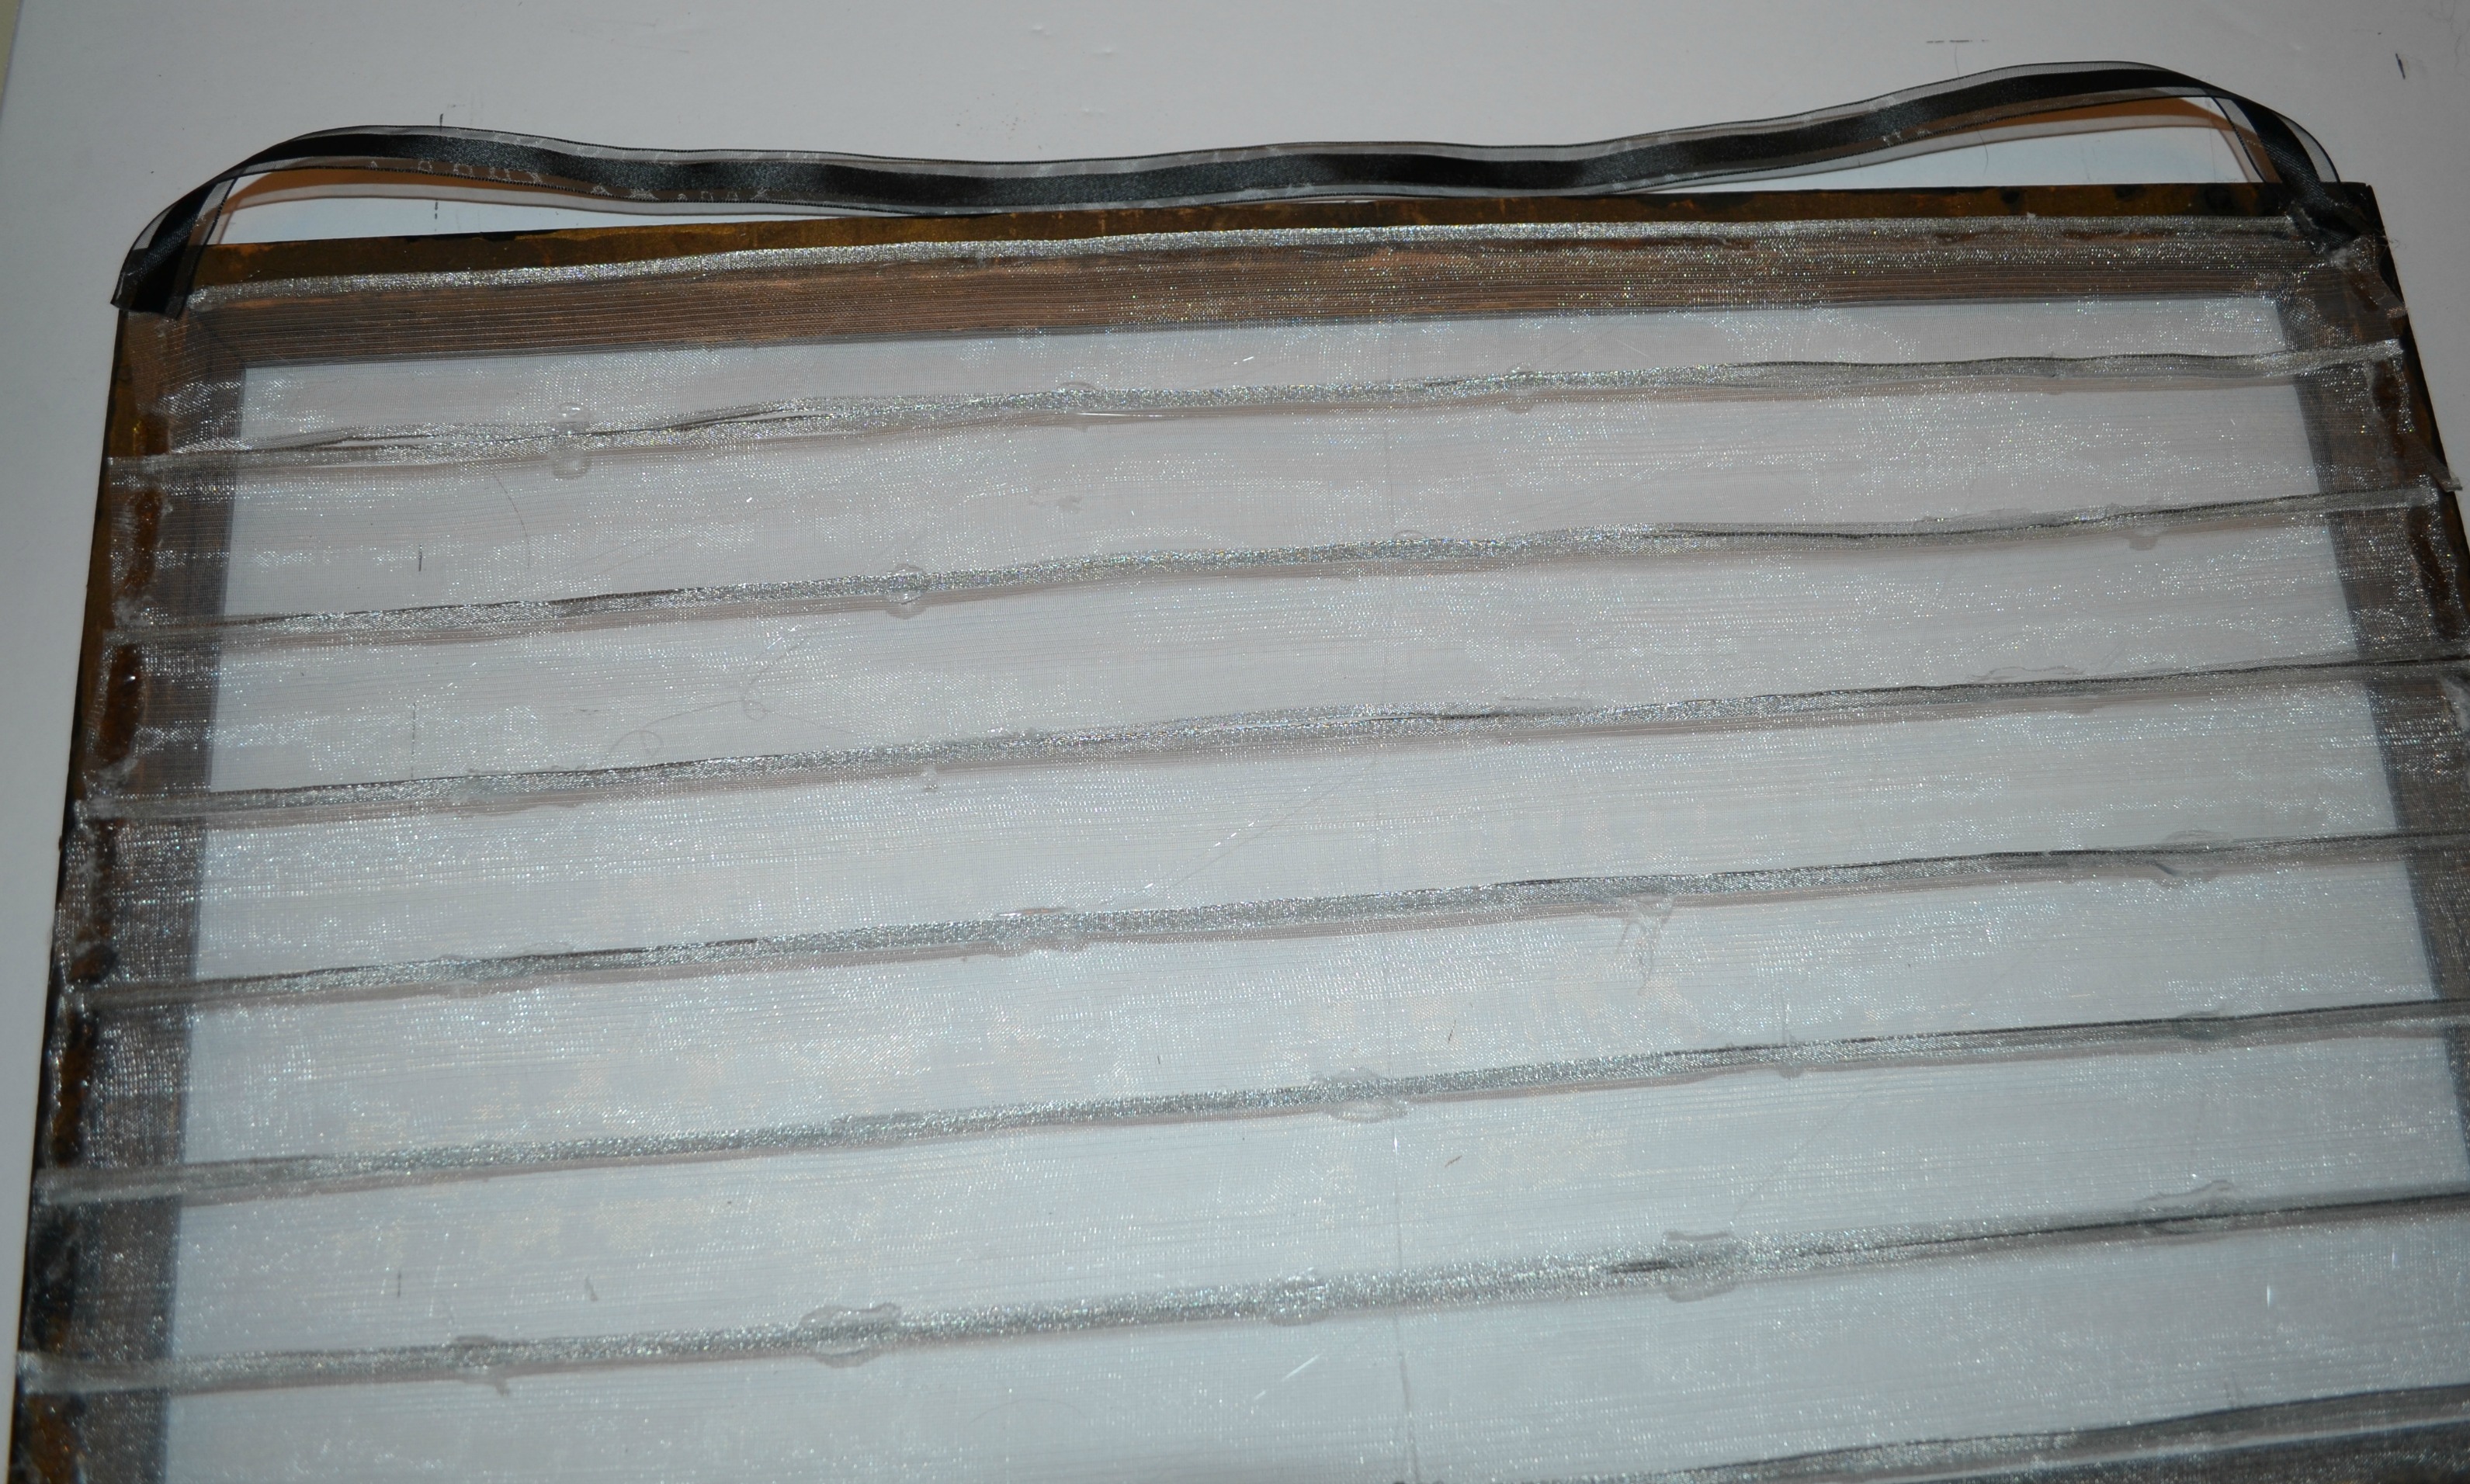
As shown above, I also added a ribbon at the top. I glued the ends to the edges of the frame. This is how I will hang it from the wall.
Then I flipped it over and strung my earrings through the ribbon, and tah-dah!

Now, keep in mind, these are just my dangly earrings. But the frame size is perfect – there are almost 60 pairs on there! There’s room for a few more pairs, and they’re all nicely presented. I used to keep them in individual bags in a box, and I would have to sort through them to find a pair I wanted to wear. This way, I can see all my earrings laid out and can just take a pair off to wear and put it back in the same spot at night.
I plan on doing something similar for my earring studs. I have a little holder now but it’s a little too small. I need to sort through those and organize them, and get rid of a bunch (I did this with my dangly pairs before putting them on this holder), and then I will get started on a second project.
Let me know what you think! Definitely let me know if you try this DIY project, or if you’ve tried something similar and have any more tips!
Related Posts

Current Mood: Single // Valentine’s Day Outfit
Valentine’s Day is coming up. I’ve been a single girl for…
January 31, 2018
Resting Witch Face Shirt + Tulle Skirt
*Some of these links may be affiliate links. You are not required to use these…
October 12, 2017
Jessica Hunt | 19th Mar 18
This is super cute and probably the perfect way to stop losing my earrings. (I just toss them in whichever “accessory drawer” I feel like.) I think if I try this, Ill use the leftover tulle or tight mesh fabric I have laying around. I wonder if it would hold up as well using the one solid piece instead of the ribbon.